Note: You find the Rigging a Horse video on youtube
The Video was made with Avastar-1
but is still mostly valid.
About this Document...
Content:
Create a Quadruped Rig (for a Horse)
The Video:
Editing the Avastar Skeleton into a Quadruped Skeleton
What does Avastar provide?
Avastar basically supports the creation of animatable Models (Avatars&attachments) and the creation of animations. Therefore the tool adds various functions and user interface elements to Blender.
The full functionality of Avastar can be a bit overwhelming on first sight. You should be prepared to spend some time and patience to get it all working nicely for your projects.
What does this Document provide?
This document is a quick start into Armature Editing. In this section you will learn how to prepare Avastar for your work on non human meshes. We use a Horse as the modelling example.
However this article only scratches the surface of Avastar’s feature set, so there is a lot more to detect and we invite you to make your own experiences as well.
We expect that you have basic knowledge about Blender.
Step 1: Preparations
The Model
In this document we use a model of a horse made by OptimoMaximo Resident as guideline for setting up the Rig. This model will shortly become available for purchasing. If you prefer then you may also find something in the blendswap horse collection.
At the end of this document we will have a Rig that we then can use for binding almost any quadruped with only small adjuatments.
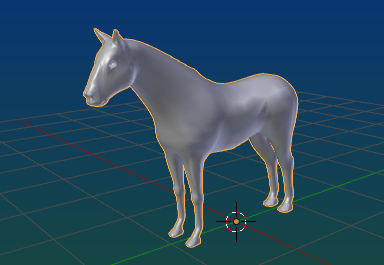
Model made by OptimoMaximo Resident from SL
Tip: In the next document about binding a quadruped we have chosen to use a spooky horse mesh (well, actually a skeleton) from neurocase at blendswap You can decide to use it right away or just follow this document by using any other quadruped you like. There shouldn’t be much variation in how to proceed.

More about the creator at www.dazpetty.com
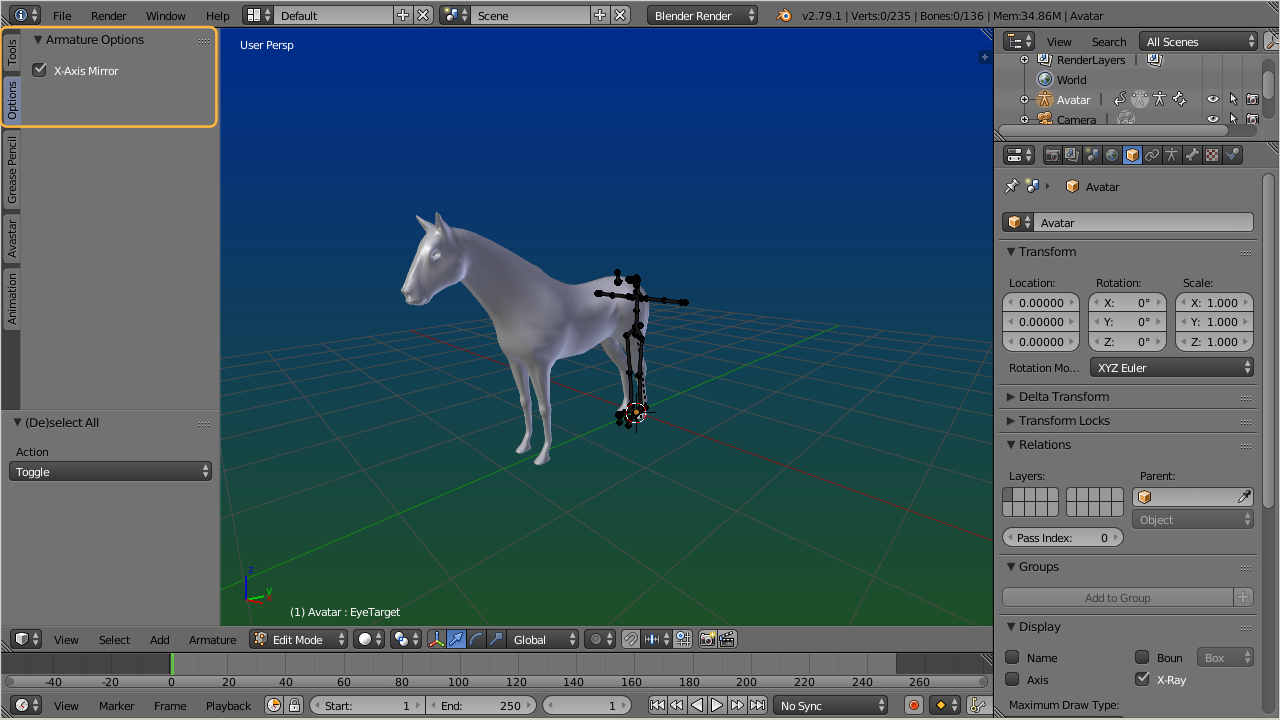
Adding an Avastar Skeleton to the scene
We do not need any Avatar meshes for our Horse. And although the Bento Skeleton already supports quadrupeds nicely, we have chosen to begin with a Basic Skeleton:
Add -> Avastar -> Basic - only Rig
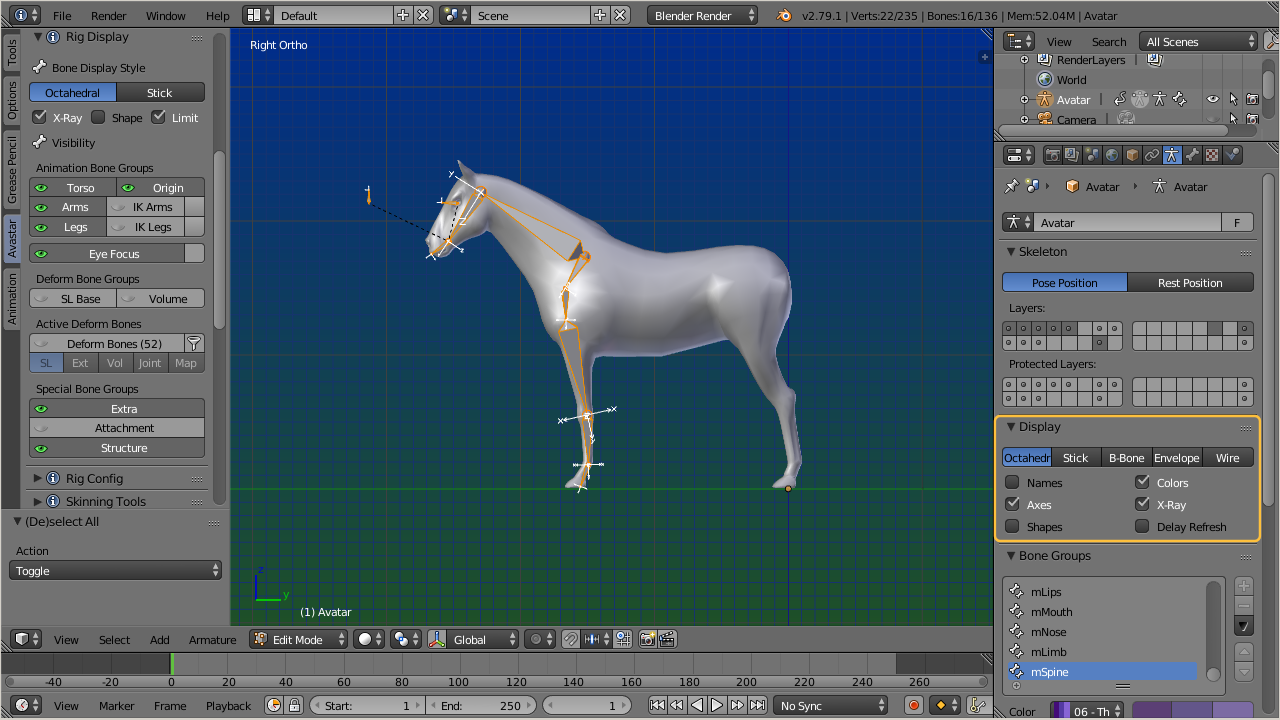
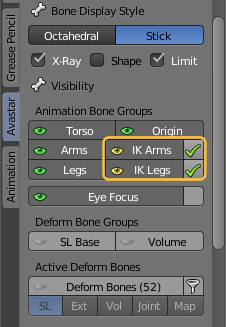
Please also make sure that the Following Bone subsets are set to visible in the Rig Display:
Torso, Origin, Arms, Legs, Eye Focus, Extra and Structure
Adjustments in Object mode
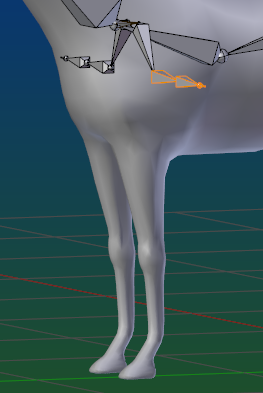
While there is no strict rule to follow, we have chosen to keep the Rig Origin at the Center for simplicity and just move the horse in Object mode, so that the hinds roughly match the Avastar legs.
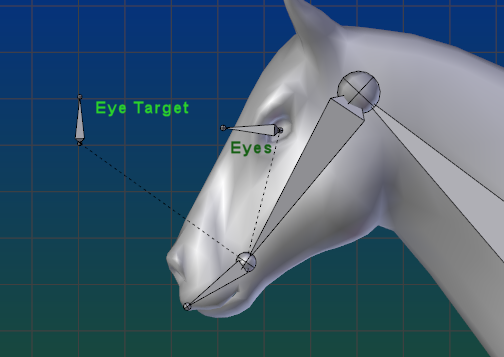
I also have moved the Eye target a bit closer to the head as we will need it there later.
Rig still at the scene Center, Horse adjusted to the Ankle bones
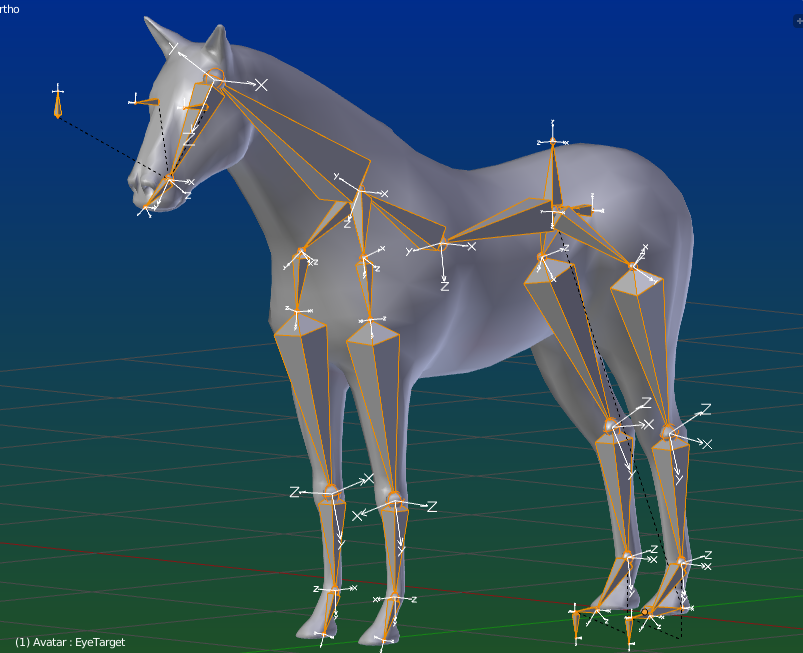
Step 2: Edit the Rig
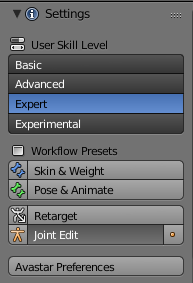
Now we go to edit mode. Please use the Joint edit preset for this as it presets the Editor options for what comes next. And make sure that you have enabled Expert Mode or Experimental Mode. otherwise you will not be able to get your work done! Note: When you edit a rig then you are an expert.
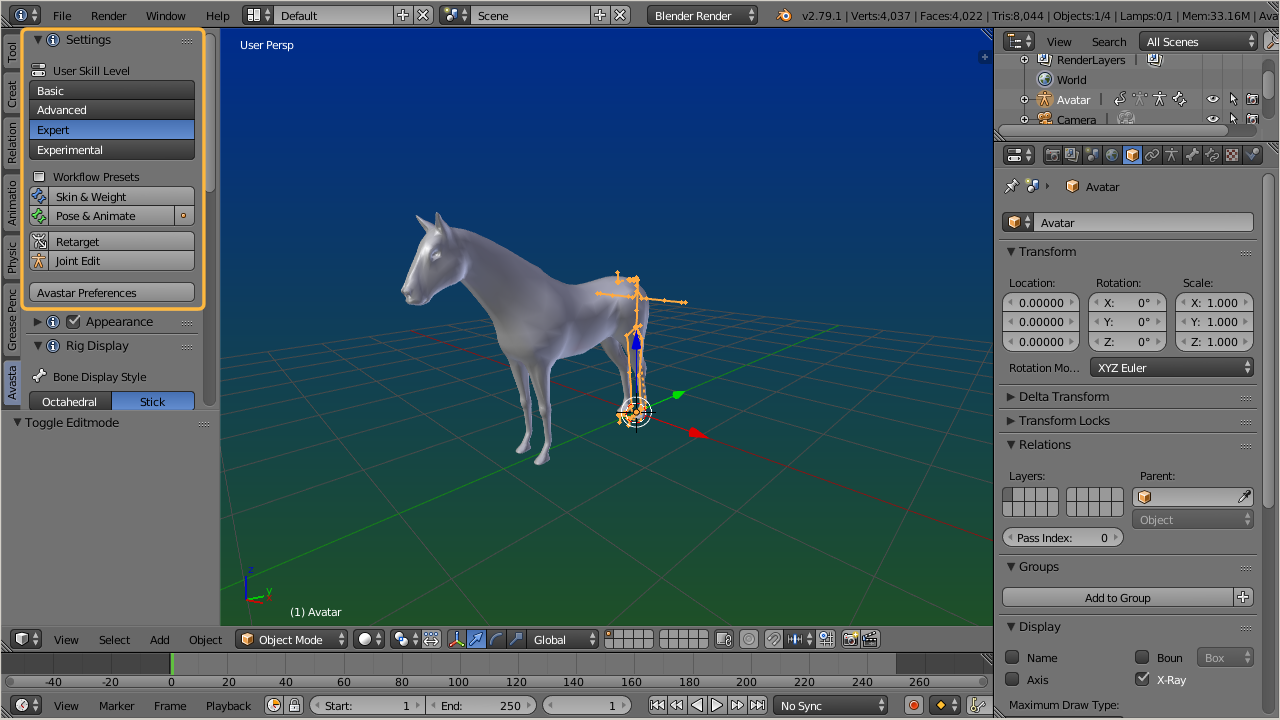
What the Joint Edit Preset does
- Make sure all (green) Animation Bones are visible
- Show the structure bones and make them editable
- Show the Eye target bone
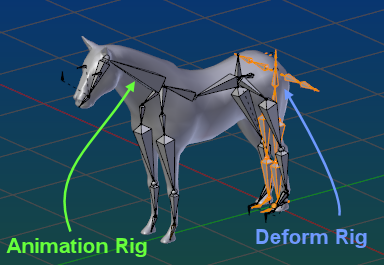
Note: We strongly discourage modifying the blue Deform Bones . You better let this to be done by Avastar.
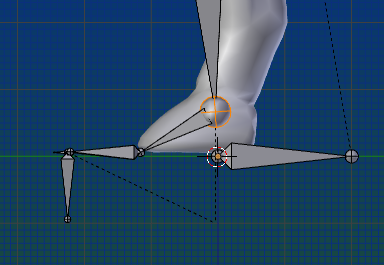
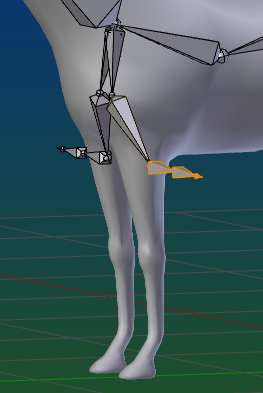
A close up of the ankle bones (use Octahedral shapes)
Tip: For the following steps you may want to enable X-Axis Mirror in the Options Tab on the Tool shelf.
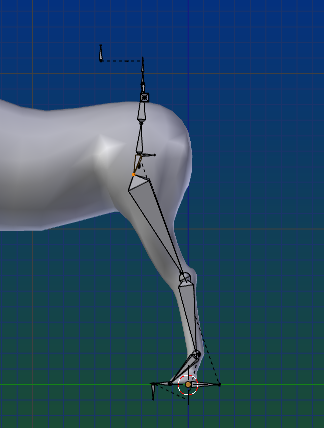
Select all Joints at the highlighted position (use ‘B’ and the rubber band) and move the joints all up as seen in the image.
Note: Actually you move 4 bones in parallel in this step:
- The left/right ankles
- and their related IK bones
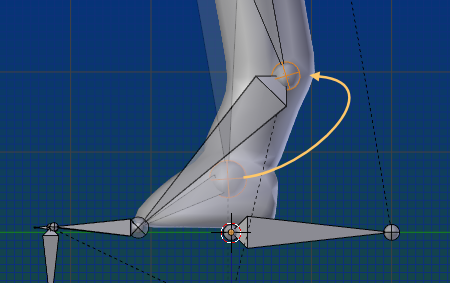
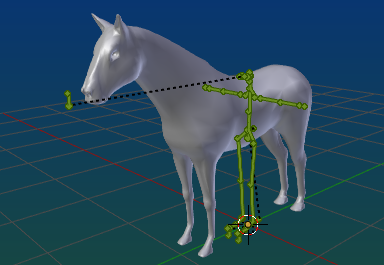
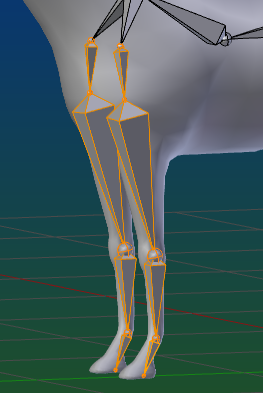
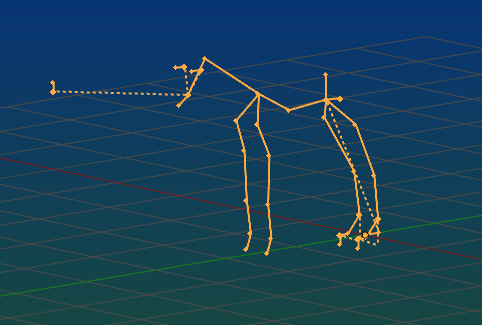
Ok, we can now move upwards along the horse legs and adjust the bones as needed until we reach the COG Bone.
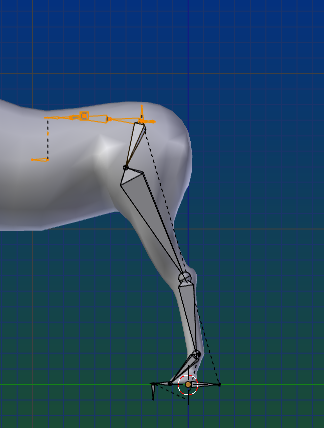
Close to the COG Bone we have to take special care that we move and rotate the COG, the Pelvis and the PelvisInv all together. Otherwise we will later get very strange issues with the posing. Please select all bones of the upper body including COG, Pelvis and PelvisInv as indicated in the image.
Then lets take a closer look at the pelvis bone. Actually you see 2 pelvis bones here: The Pelvis and the PelvisInv created in opposite directions.
We must keep these 2 bones aligned as they are, but we can select the end joints of both bones and move them a bit towards the horse’s back.
This will later become relevant when we get to animation.

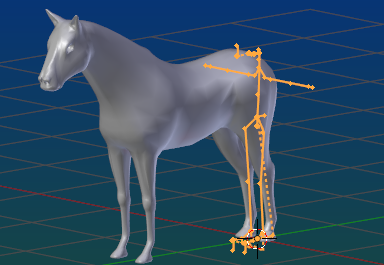
Now move the bones upward and rotate them all by 90 degrees as in this image. The now selected bones will be used for the entire front of the horse as we show in the next few images.
Finish the Rig editing in Images

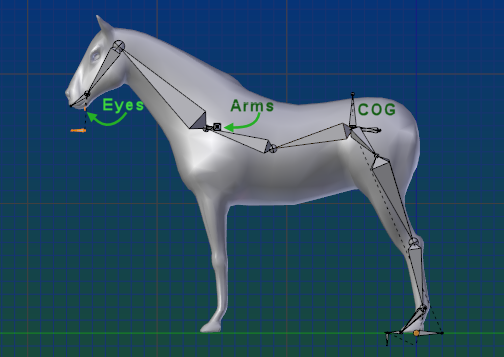
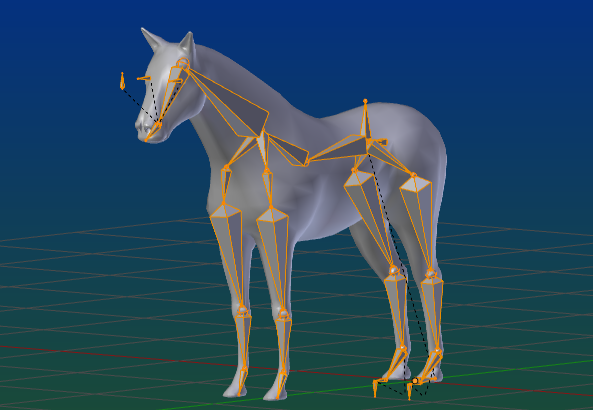
The finished version of the Rig
Step 3: Cleanup
So far we have edited the animation bones of the rig. Now we must do 2 additional things:
- Cleanup the Deform Rig (see image).
- Inform Avastar about the modified joints
However this is no big deal, You just need to push the right button…
Enable the SL Base bones in the Rig Display panel.
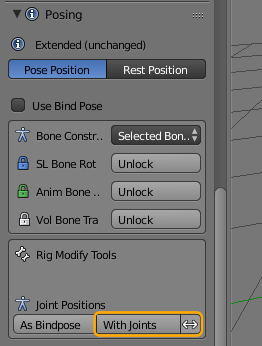
- Open the Posing Panel
- Locate the Rig Modify Tools section (Joint Positions)
- Make sure the double sided arrow is not selected
- Click on With Joints
Note: The Eye target may move when you store the Joint edits. This is so because Avastar wants the Target to be far away from the Eye bones and tries to fix your editing. This is a known issue.
What Store Joint edits does
Avastar supports Appearance sliders also for edited Rigs. But in order to achieve this, Avastar must recalculate some internal values. This calculation is performed when you call the With Joints function.
The double sided arrow: (when not selected) tells Avastar to adjust the Deform bones (blue) to the Animation bones (green) when calculating the Joint positions. If you need to revert the adjustment (snap the animation rig to the deform rig), then you will enable that icon before hitting the With Joints button.
As Bindpose: For a modified Rig like our horse rig you normally do not want to use the other option As Bindpose. That feature makes most sense for slightly modified human rigs, especially when you need to work with an A-Posed Rig.
After you have called the Store Edit Joints function your Animation Bones and Deform bones are again perfectly in synchronization.
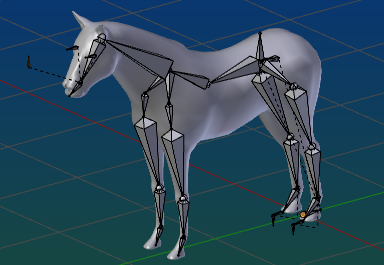
After Store Joint Edits the bones are synchronized again.
Step 4: Adjust the Bone Roll
The front legs of the Horse have been bended downwards by 90 degree. This affects the Bone roll and we have to fix that now, otherwise we end up with very unpleasant distortions on the mesh after uploading to SL. And luckily – since Blender 2.77 – we have a very convenient cleanup function to fix the Bone Roll.
- Open the Rig Display Panel
- Enable visibility of the (blue) SL Base Bones
- Enable axes in the bone display properties,
just to see what happens next - Select all Bones
- Armature -> Bone Roll -> Clear Roll ( shortcut: ALT R)

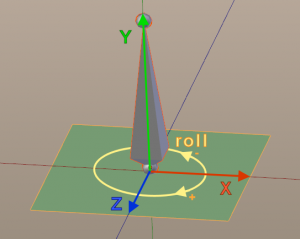
What is Bone Roll?
In simple words this is the rotation of a bone relative to its long axis (see image).
The main problem that we have here is: We do not have a way to find out where Boneroll = 0 is. The Blender Operator ALT R (Clear Bone Roll) actually resets the bone roll to 0 and rotates the bone(s) so that the Octahedral representation is aligned to the local coordinate system.
Before fix: Bone roll is bad on front legs

After fix: Bone roll is aligned correctly for all bones.
Step 5: Adjust the IK
The Horse skeleton (and also the skeleton for most other Quadrupeds) shows an important difference regarding the limbs. they actually rotate in opposite direction compared to the human skeleton.
Because of this we have to fix the IK Bones:
- Enable the IK Bones in the Rig Display Panel.
- If you have X Mirror still enabled (see above), then make sure that you select only one of the IKTarget bones at a time. the symmetric bone will follow anyways.
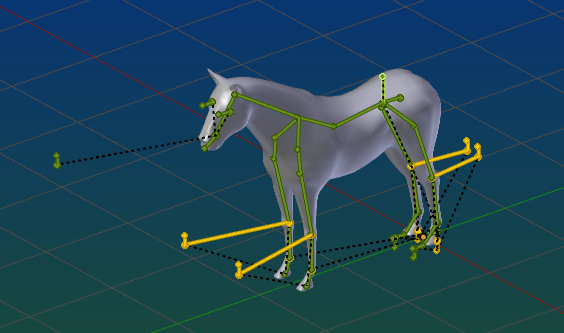
- Move IKNeeTarget to the back of the horse body
- Move IKElbowTarget to the front of the horse body
- Important: In the Posing panel: Store Joint edits
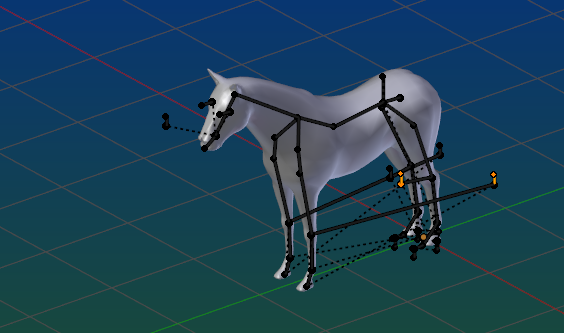
Before the IK Targets are fixed.
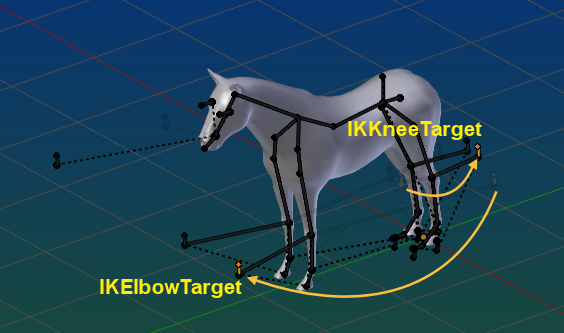
After IK Targets have been fixed
Hint: The Eye Target changes it position when you store the joints. This is because Avastar wants the target to be far away from the eyes and it disregards your edits. this is a known issue.
Now its time to switch to Pose mode to make the final adjustments for the Rig…
Step 6: Adjust Contraints
Switching to Pose mode should now only change the colors of the bones but not their position. If you see positional changes of the Bones then you probably have edited the wrong bones in your rig. Take care the that Pelvis and PelvisInv bones are matched to each other.
Rig in pose mode.
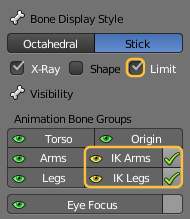
- Make sure the IK Bones are enabled and visible (Rig Display)
- Also enable the Limit display (see image)
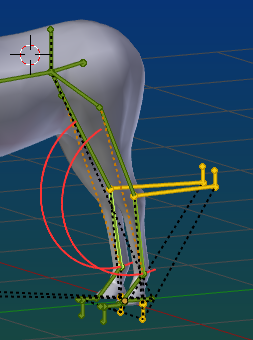
- Select the COG and movit downwards a bit. You will see 2 issuies which must be fixed:
- The hind legs only bend a bit but into the wrong direction.
- The front legs show an odd bone crossing
Lets begin with the Hind legs and select the LeftKnee.
Now you see the bone rotation constraints allow the knee to rotate into the wrong direction. WE need the constraint to be exactly on the other side.
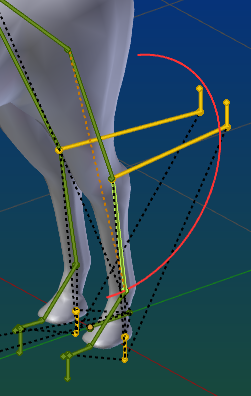
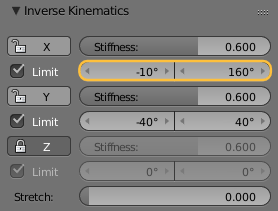
- Open the Inverse Kinematics panel in the Bone Properties editor
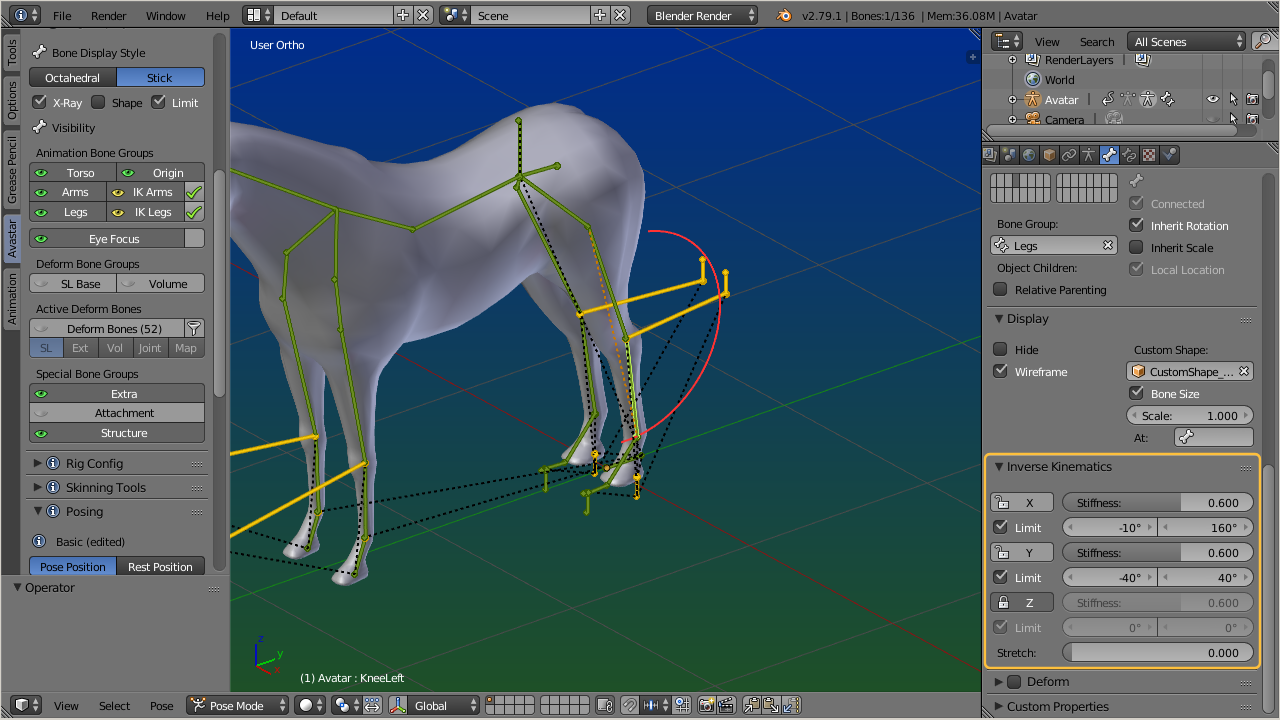
- Now change the X Limit from [-10, 160] to [-160, 10] This inverts the constraint.
- Do the same for the RightKnee.
Now the hinds are fixed. You can test this by selecting the COG bone again and then moving it downwards. If all has been setup right then now the bones behave as expected for a horse.
Note: The constraints values can still be optimized. In reality a horse can not bend its knees to such huge angles. Please play with the settings that match best for your character.
When you move the COG down a bit then you see the front leg bones are crossing. This happens because the inverse kinematic has been constrained for a human skeleton. But the legs have been bended downwards, so we have to fix this.
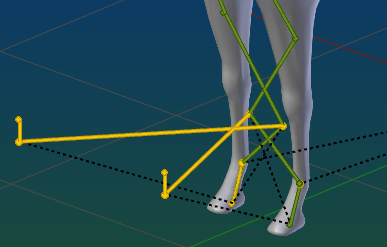
- Select the ElbowLeft
- Open the Inverse Kinematics panel
- Disable the X Lock
- Enable the Z Lock
Do the same for ElbowRight. Now the Bones behave as expected.

So when you now move the COG bone upwards then the knees of the horse legs move forward/backward. If your Rig behaves in the same way, then you have managed to create a working Rig with IK support.

Our goal is to have a Rig that can be reused for many different Quadrupeds. So in the final step we
- remove the Mesh
- Put the armature into its restpose
- Rename the armature from Avatar to Quadruped Rig
- switch to Object mode
- Store the blend file into a convenient place
Our Quadruped Rig, prepared for Reuse in other projects
Trouble Shooting
My Rig bends in wrong direction
I have setup my Rig with all constraints fixed. But still the limbs bend in the wrong direction. How can i fix that?
When the constraints are set correctly or when there are no constraints set at all, then the IK resolver still can get into trouble when the rest pose angle between 2 bones is setup in the wrong direction.
In the example image the angle between the Elbow bone and its parent bone (shoulder) is set too far to the right. In this case the IK Resolver tries to move the joint backward when the COG bone is moved downward. But the Rig creator actually has expected the joint to move forward in this situation.
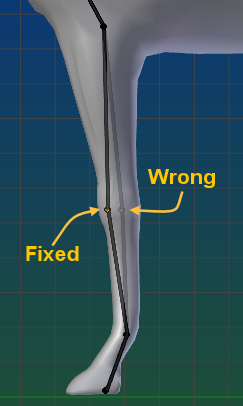
The fix is indicated in the image: Just move the joint a bit so that the angle betwenn the two bones opens in the opposite direction.